Workouts
✓ OfficialOfficial · One card per session — presets fill in the exercises and the sets.
Exercises
No default sub-entries
A Workout entry is one session: a title, a date, and a list of sets underneath it. Each set lives in the exercise's own collection — Push-ups, Pull-ups, Kettlebell front squat, and four more — so reps and weight stay attached to the movement they belong to, and "am I actually getting stronger at pull-ups?" is a question your log can answer.
Logging a session is one card. Pick a preset and the whole session appears already filled in: the right exercises, in the right order, with the set counts and starting reps prefilled. You change the numbers you actually did. Nothing to name, nothing to arrange, nothing to look up mid-set.
Two presets come with it. Calisthenics Workout lays out pull-ups, push-ups, assisted one-leg sit-ups and crunches with a rep ladder already written in. Kettlebell full body workout lays out front squats, Arnold presses, sumo deadlifts, push-ups and crunches, four sets each. Every exercise also carries its own how-to page — setup, the movement, the common mistakes, how to regress it when it is too hard and how to progress it when it stops being hard — so the form check sits next to the set you are logging.
Everything is yours once you copy it. Rename an exercise, delete one you cannot do yet, add your own, and build a preset for your own split. Presets are starting values, never a cage.
How to do each exercise
| Name | Exercises |
|---|---|
Calisthenics Workout | — |
Kettlebell full body workout | — |
Quick core finisher | — |
Exercises
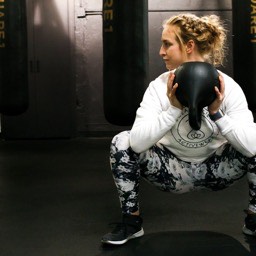 Kettlebell front squat×4
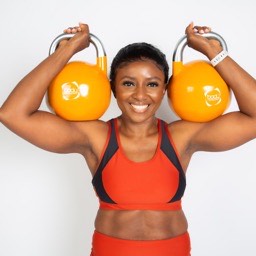 Kettlebell Arnold press×4
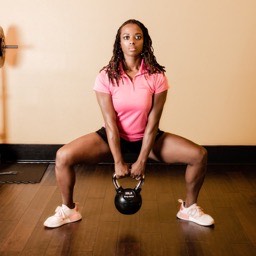 Kettlebell sumo deadlift×4
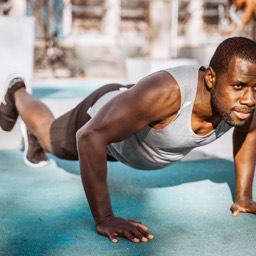 Push-ups×4
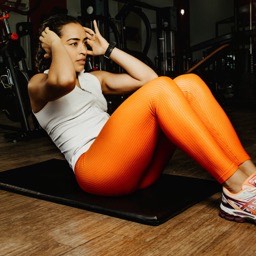 Crunches×4
Exercises
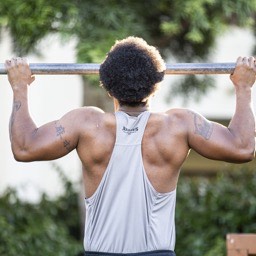 Pull-upsRepetitions 7×2Pull-upsRepetitions 5×2Push-upsreps 12×2Push-upsreps 15×1Push-upsreps 17×1
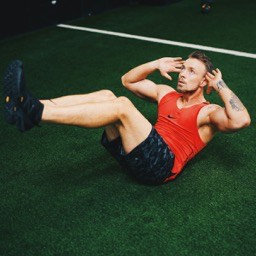 One-leg sit-up (assisted)Repetitions 15×1One-leg sit-up (assisted)Repetitions 12×3Crunchesreps 50×1Crunchesreps 40×1Crunchesreps 50×2
</> Card layout JSON (collections.layout) · read-only
{
  "expand": "page",
  "version": 2,
  "dividers": false,
  "elements": [
    {
      "id": "body",
      "type": "field",
      "visible": true,
      "property": "body",
      "hideWhenEmpty": true
    },
    {
      "id": "title",
      "type": "field",
      "style": {
        "span": 12,
        "order": 0
      },
      "property": "title"
    },
    {
      "id": "sub_entries_1",
      "type": "field",
      "style": {
        "span": 12,
        "order": 1
      },
      "property": "sub_entries_1",
      "subEntryMode": "grouped",
      "subEntryColumns": [
        "reps",
        "weight"
      ]
    }
  ]
}
</> The listing manifest · read-only
{
"kind": "collection",
"root": "workouts",
"version": 2,
"includes": [
{
"kind": "preset",
"role": "includes",
"slug": "kettlebell-full-body-workout",
"required": false
},
{
"kind": "preset",
"role": "includes",
"slug": "calisthenics-workout",
"required": false
}
],
"collections": [
{
"key": "workouts",
"kind": "entity",
"name": "Workouts",
"emoji": "💪",
"views": [
{
"key": "workouts-table",
"name": "Table",
"scope": "collection",
"document": {
"id": "table",
"kind": "table",
"name": "Table",
"version": 2,
"columnOrder": [
"__name__",
"__date__",
"__summary__"
],
"wrapColumns": [
"__summary__"
]
},
"collection_key": "workouts"
}
],
"layout": {
"expand": "page",
"version": 2,
"dividers": false,
"elements": [
{
"id": "body",
"type": "field",
"visible": true,
"property": "body",
"hideWhenEmpty": true
},
{
"id": "title",
"type": "field",
"style": {
"span": 12,
"order": 0
},
"property": "title"
},
{
"id": "sub_entries_1",
"type": "field",
"style": {
"span": 12,
"order": 1
},
"property": "sub_entries_1",
"subEntryMode": "grouped",
"subEntryColumns": [
"reps",
"weight"
]
}
]
},
"presets": [
{
"key": "workouts-kettlebell-full-body-workout",
"document": {
"icon": "💪",
"name": "Kettlebell full body workout",
"values": {
"title": "Kettlebell full body workout"
},
"children": [
{
"count": 4,
"collection_key": "kettlebell-front-squat"
},
{
"count": 4,
"collection_key": "kettlebell-arnold-press"
},
{
"count": 4,
"collection_key": "kettlebell-sumo-deadlift"
},
{
"count": 4,
"collection_key": "push-ups"
},
{
"count": 4,
"collection_key": "crunches"
}
]
},
"collection_key": "workouts"
},
{
"key": "workouts-calisthenics-workout",
"document": {
"icon": "💪",
"name": "Calisthenics Workout",
"values": {
"title": "Calisthenics Workout"
},
"children": [
{
"count": 2,
"values": {
"reps": 7
},
"collection_key": "pull-ups"
},
{
"count": 2,
"values": {
"reps": 5
},
"collection_key": "pull-ups"
},
{
"count": 2,
"values": {
"number_1": 12
},
"collection_key": "push-ups"
},
{
"count": 1,
"values": {
"number_1": 15
},
"collection_key": "push-ups"
},
{
"count": 1,
"values": {
"number_1": 17
},
"collection_key": "push-ups"
},
{
"count": 1,
"values": {
"reps": 15
},
"collection_key": "one-leg-sit-up-assisted"
},
{
"count": 3,
"values": {
"reps": 12
},
"collection_key": "one-leg-sit-up-assisted"
},
{
"count": 1,
"values": {
"reps": 50
},
"collection_key": "crunches"
},
{
"count": 1,
"values": {
"reps": 40
},
"collection_key": "crunches"
},
{
"count": 2,
"values": {
"reps": 50
},
"collection_key": "crunches"
}
]
},
"collection_key": "workouts"
}
],
"bindings": [
{
"data_type": "title",
"binding_key": "title",
"column_span": 4,
"property_key": "entry-title",
"display_order": 0,
"page_visibility": "always_show"
},
{
"data_type": "subentries",
"binding_key": "sub_entries_1",
"column_span": 1,
"property_key": "sub-entries",
"display_order": 1,
"page_visibility": "always_show",
"custom_display_name": "Exercises"
}
],
"body_mode": "none",
"sample_entries": [
{
"title": "Calisthenics Workout",
"values": {}
},
{
"title": "Kettlebell full body workout",
"values": {}
},
{
"title": "Quick core finisher",
"values": {}
}
],
"title_column_span": 2,
"title_display_order": 0
},
{
"key": "push-ups",
"kind": "entity",
"name": "Push-ups",
"emoji": "image:/exercise-icons/push-ups.jpg",
"layout": {
"expand": "page",
"render": "flow",
"version": 2,
"dividers": false,
"elements": [
{
"id": "body",
"type": "field",
"visible": true,
"property": "body",
"hideWhenEmpty": true
},
{
"id": "title",
"type": "field",
"label": "icon",
"style": {
"span": 9,
"order": 0,
"alignItems": "center"
},
"property": "title",
"labelPosition": "left"
},
{
"id": "metrics",
"type": "group",
"style": {
"gap": "md",
"span": 3,
"order": 1,
"alignItems": "center"
},
"elements": [
{
"id": "number_1",
"type": "field",
"label": "text",
"style": {
"fill": false,
"fontSize": "sm",
"labelGap": 2,
"alignItems": "center"
},
"property": "number_1",
"labelPosition": "right"
}
]
}
]
},
"bindings": [
{
"data_type": "title",
"binding_key": "title",
"column_span": 4,
"property_key": "entry-title",
"display_order": 0,
"page_visibility": "always_show"
},
{
"data_type": "number",
"binding_key": "number_1",
"column_span": 1,
"property_key": "number",
"display_order": 1,
"page_visibility": "always_show",
"custom_display_name": "reps"
}
],
"body_mode": "none",
"description": "## How to do a push-up\n\nThe push-up is a full-body pressing movement: chest, shoulders, and triceps do the pushing while your core and glutes hold your body in one rigid line. Done well, it is one of the best strength exercises that needs zero equipment.\n\n**Watch this first — 2 minutes:**\n\nhttps://www.youtube.com/watch?v=IODxDxX7oi4\n\n### Setup\n\n1. Hands on the floor slightly wider than shoulder-width, fingers pointing forward, stacked under your shoulders.\n2. Legs extended behind you, feet together or hip-width.\n3. Squeeze your glutes and brace your abs — your body should form **one straight line** from head to heels. Hold that line for the whole set.\n\n### The movement\n\n1. Lower yourself under control (~2 seconds) by bending your elbows. Keep them at roughly a **45° angle** to your torso — not flared straight out, not pinned to your ribs.\n2. Go down until your chest is about a fist's height from the floor (or lightly touches it).\n3. Press the floor away until your arms are fully straight. That's one rep.\n4. Breathe in on the way down, out on the way up.\n\n### Common mistakes\n\n- **Sagging hips** — the line breaks and your lower back takes the load. Squeeze glutes harder.\n- **Hips piked up** — turns it into an easier, shorter movement. Keep the straight line.\n- **Half reps** — going down 10 cm. Full range: chest near the floor, arms fully locked at the top.\n- **Flared elbows (90°)** — hard on the shoulders. Tuck them toward ~45°.\n- **Head pecking** — chin diving at the floor while the chest stays high. Lead with your chest, keep your neck neutral.\n\n### Too hard? Regress it\n\nKeep the same straight-line form, just reduce the load:\n\n1. **Incline push-ups** — hands on a bench, table, or wall. The higher the hands, the easier. Work down toward the floor over time.\n2. **Knee push-ups** — same line from head to knees.\n\nA good rule: when you can do ~12 clean reps at one level, move to the next harder one.\n\n### Too easy? Progress it\n\n- **Decline push-ups** — feet elevated on a bench or step.\n- **Diamond push-ups** — hands close together, more triceps.\n- **Weighted push-ups** — backpack with books, or a plate on your back.\n- **Slow tempo** — 3 seconds down, 1 second pause at the bottom.\n\n### How many?\n\n- Log **every set here** — quality reps only; stop 1–2 reps before your form breaks.\n- 3–4 sets, 2–4× per week is plenty for steady progress.\n- Progress by adding 1–2 reps per session, then move to a harder variation once reps get high (~20+).\n",
"sample_entries": [
{
"title": null,
"values": {
"number_1": 12
}
},
{
"title": null,
"values": {
"number_1": 15
}
},
{
"title": null,
"values": {
"number_1": 17
}
}
],
"title_column_span": 1,
"title_display_order": 0
},
{
"key": "pull-ups",
"kind": "entity",
"name": "Pull-ups",
"emoji": "image:/exercise-icons/pull-ups.jpg",
"layout": {
"expand": "page",
"render": "flow",
"version": 2,
"dividers": false,
"elements": [
{
"id": "title",
"type": "field",
"label": "icon",
"style": {
"span": 9,
"order": 0,
"alignItems": "center"
},
"property": "title",
"labelPosition": "left"
},
{
"id": "metrics",
"type": "group",
"style": {
"gap": "md",
"span": 3,
"order": 1,
"alignItems": "center"
},
"elements": [
{
"id": "reps",
"type": "field",
"label": "unit",
"style": {
"fill": false,
"fontSize": "sm",
"labelGap": 2,
"alignItems": "center"
},
"property": "reps",
"labelPosition": "right"
}
]
}
]
},
"bindings": [
{
"data_type": "number",
"binding_key": "reps",
"column_span": 1,
"property_key": "repetitions",
"display_order": 0,
"page_visibility": "always_show"
},
{
"data_type": "title",
"binding_key": "title",
"column_span": 4,
"property_key": "entry-title",
"display_order": 0,
"page_visibility": "always_show"
},
{
"data_type": "markdown",
"binding_key": "body",
"column_span": 4,
"property_key": "page",
"display_order": 1,
"page_visibility": "always_show"
}
],
"body_mode": "none",
"description": "## How to do a pull-up\n\nThe best upper-body pulling exercise there is: lats, upper back and biceps pull you up, and your core keeps you from swinging. Hard to cheat, which is why progress here is real progress.\n\n**Watch this first:**\n\nhttps://www.youtube.com/watch?v=GBqAZP6jquc\n\n### Setup\n\n1. Grip the bar slightly wider than your shoulders, palms facing away (overhand).\n2. Hang with straight arms, then **pull your shoulder blades down and back** — this is the position you keep the whole set. Shrugged-up shoulders are where injuries come from.\n3. Squeeze your glutes and brace your abs; legs straight or crossed behind you.\n\n### The movement\n\n1. Lead with your **elbows driving down toward the floor**, not with your chin.\n2. Pull until your chin clears the bar (chest toward the bar is the ideal).\n3. Lower under control, all the way to straight arms — a full hang each rep.\n4. Breathe out on the way up, in on the way down.\n\n### Common mistakes\n\n- **Kipping / swinging** — momentum, not strength. Keep your body still and vertical.\n- **Half reps** — not reaching a full hang at the bottom. Full range or it does not count.\n- **Shrugging** — shoulders up by your ears. Pull the blades down first, then bend the arms.\n- **Neck craning** — reaching for the bar with your chin. Keep the neck neutral.\n\n### Too hard? Regress it\n\n1. **Dead hang** — just hang for 20–30s to build grip and shoulder position.\n2. **Negatives** — jump to the top, lower as slowly as you can (aim 5s). Brutally effective.\n3. **Band-assisted pull-ups** — loop a band under your feet or knees.\n4. **Inverted rows** — bar at waist height, body at an angle. Lower the bar to make it harder.\n\n### Too easy? Progress it\n\n- **Weighted pull-ups** — backpack or a dipping belt.\n- **Slow tempo** — 3s up, 3s down.\n- **Archer / commando pull-ups**, and eventually one-arm progressions.\n\n### How many?\n\n- Log every set. Stop 1–2 reps before form breaks — swinging reps teach the wrong pattern.\n- 3–5 sets, 2–3× per week. Low reps are normal here; adding one clean rep is a good week.\n",
"sample_entries": [
{
"title": null,
"values": {
"reps": 5
}
},
{
"title": null,
"values": {
"reps": 7
}
},
{
"title": null,
"values": {
"reps": 6
}
}
],
"title_column_span": 2,
"title_display_order": 0
},
{
"key": "kettlebell-sumo-deadlift",
"kind": "entity",
"name": "Kettlebell sumo deadlift",
"emoji": "image:/exercise-icons/kettlebell-sumo-deadlift.jpg",
"layout": {
"expand": "page",
"render": "flow",
"version": 2,
"dividers": false,
"elements": [
{
"id": "title",
"type": "field",
"label": "icon",
"style": {
"span": 7,
"order": 0,
"alignItems": "center"
},
"property": "title",
"labelPosition": "left"
},
{
"id": "metrics",
"type": "group",
"style": {
"gap": "md",
"span": 5,
"order": 1,
"alignItems": "center"
},
"elements": [
{
"id": "weight",
"type": "field",
"label": "unit",
"style": {
"fill": false,
"fontSize": "sm",
"labelGap": 2,
"alignItems": "center"
},
"property": "weight",
"labelPosition": "right"
},
{
"id": "reps",
"type": "field",
"label": "unit",
"style": {
"fill": false,
"fontSize": "sm",
"labelGap": 2,
"alignItems": "center"
},
"property": "reps",
"labelPosition": "right"
}
]
}
]
},
"bindings": [
{
"data_type": "title",
"binding_key": "title",
"column_span": 4,
"property_key": "entry-title",
"display_order": 0,
"page_visibility": "always_show"
},
{
"data_type": "number",
"binding_key": "reps",
"column_span": 1,
"property_key": "repetitions",
"display_order": 1,
"page_visibility": "always_show",
"custom_display_name": "reps"
},
{
"data_type": "number",
"binding_key": "weight",
"column_span": 1,
"property_key": "weight",
"display_order": 2,
"page_visibility": "always_show",
"custom_display_name": "kg"
},
{
"data_type": "markdown",
"binding_key": "body",
"column_span": 4,
"property_key": "page",
"display_order": 3,
"page_visibility": "always_show"
}
],
"body_mode": "none",
"description": "## How to do a kettlebell sumo deadlift\n\nA hip hinge with a wide stance and the bell between your feet. Trains glutes, hamstrings and back — and it is the movement that teaches the hinge every other kettlebell lift depends on.\n\n**Watch this first:**\n\nhttps://www.youtube.com/watch?v=sGNMEtZCkRY\n\n### Setup\n\n1. Stand with feet **wider than shoulder-width**, toes turned out 20–45°, bell on the floor between your feet.\n2. Push your hips **back** (not down) and bend the knees until you can reach the handle. Knees track over your toes, never caving inward.\n3. Chest up, back flat, shoulders pulled down and back. Grip the handle with both hands.\n\n### The movement\n\n1. Take the slack out — tighten your grip and pull your shoulders down before anything moves.\n2. **Drive through your heels** and stand up by pushing the floor away, squeezing your glutes at the top.\n3. Stand tall — do not lean back or overextend at the top.\n4. Reverse it: hips back first, then knees, and set the bell down under control.\n5. Breathe in at the bottom, out as you stand.\n\n### Common mistakes\n\n- **Rounding the lower back** — the one that actually hurts you. Chest up, back flat, reduce the weight if you cannot hold it.\n- **Squatting instead of hinging** — hips must travel back, not straight down.\n- **Knees caving in** — actively push them out toward your toes.\n- **Yanking the bell** — take the slack out first; do not jerk it off the floor.\n- **Leaning back at the top** — stand tall and stop.\n\n### Too hard? Regress it\n\n- **Elevate the bell** on a box or a couple of books — a shorter range while you learn the hinge.\n- Practice the hinge with no weight, a stick along your spine touching head, upper back and tailbone.\n\n### Too easy? Progress it\n\n- Heavier bell, or two bells.\n- **Pause at the bottom** for 2s to kill momentum.\n- **Single-leg / staggered stance** variations.\n\n### How many?\n\n- Log every set. Stop the set the moment your back rounds — that is the real limit, not fatigue.\n- 3–5 sets of 5–10, 2–3× per week.\n",
"sample_entries": [
{
"title": null,
"values": {
"reps": 10,
"weight": 16
}
},
{
"title": null,
"values": {
"reps": 8,
"weight": 24
}
},
{
"title": null,
"values": {
"reps": 6,
"weight": 32
}
}
],
"title_column_span": 2,
"title_display_order": 0
},
{
"key": "crunches",
"kind": "entity",
"name": "Crunches",
"emoji": "image:/exercise-icons/crunches.jpg",
"layout": {
"expand": "page",
"render": "flow",
"version": 2,
"dividers": false,
"elements": [
{
"id": "title",
"type": "field",
"label": "icon",
"style": {
"span": 9,
"order": 0,
"alignItems": "center"
},
"property": "title",
"labelPosition": "left"
},
{
"id": "metrics",
"type": "group",
"style": {
"gap": "md",
"span": 3,
"order": 1,
"alignItems": "center"
},
"elements": [
{
"id": "reps",
"type": "field",
"label": "unit",
"style": {
"fill": false,
"fontSize": "sm",
"labelGap": 2,
"alignItems": "center"
},
"property": "reps",
"labelPosition": "right"
}
]
}
]
},
"bindings": [
{
"data_type": "title",
"binding_key": "title",
"column_span": 4,
"property_key": "entry-title",
"display_order": 0,
"page_visibility": "always_show"
},
{
"data_type": "number",
"binding_key": "reps",
"column_span": 1,
"property_key": "repetitions",
"display_order": 1,
"page_visibility": "always_show",
"custom_display_name": "reps"
},
{
"data_type": "markdown",
"binding_key": "body",
"column_span": 4,
"property_key": "page",
"display_order": 2,
"page_visibility": "always_show"
}
],
"body_mode": "none",
"description": "## How to do a crunch\n\nA short, controlled flexion of the spine that targets the upper abs. Small movement, big difference between doing it right and yanking on your neck.\n\n**Watch this first:**\n\nhttps://www.youtube.com/watch?v=YdZakh0Pkwc\n\n### Setup\n\n1. Lie on your back, knees bent, feet flat on the floor.\n2. Hands lightly behind your head or crossed on your chest. **Fingertips only** behind the head — never lace your fingers and pull.\n3. Keep a small gap between your chin and chest, as if holding an apple there.\n\n### The movement\n\n1. Curl your **shoulder blades off the floor** by shortening the distance between ribs and hips.\n2. Stop once the blades clear the floor — that is the full range. Your lower back stays down.\n3. Pause for a beat at the top and squeeze.\n4. Lower slowly. Breathe out on the way up, in on the way down.\n\n### Common mistakes\n\n- **Pulling on the neck** — the classic. Hands are a rest, not a lever.\n- **Going too high** — past shoulder-blade height it becomes a sit-up and the hip flexors take over.\n- **Speed reps** — bouncing off the floor. Slow down; the tension is the point.\n- **Holding your breath** — exhale as you curl.\n\n### Too hard? Regress it\n\n- **Reduce range** — lift just the head and shoulders an inch, hold 2s.\n- Cross your arms on your chest instead of behind your head (shorter lever).\n\n### Too easy? Progress it\n\n- **Arms straight overhead** — longer lever, much harder.\n- **Slow tempo** — 3s up, 2s hold, 3s down.\n- **Weighted crunch** — hold a plate or kettlebell on your chest.\n- **Cable / decline crunches** for added load.\n\n### How many?\n\n- Log every set. Quality over quantity — 15 controlled reps beat 50 sloppy ones.\n- 3 sets, 2–4× per week. Progress with tempo and load before chasing rep counts.\n",
"sample_entries": [
{
"title": null,
"values": {
"reps": 40
}
},
{
"title": null,
"values": {
"reps": 50
}
},
{
"title": null,
"values": {
"reps": 50
}
}
],
"title_column_span": 2,
"title_display_order": 0
},
{
"key": "one-leg-sit-up-assisted",
"kind": "entity",
"name": "One-leg sit-up (assisted)",
"emoji": "image:/exercise-icons/situps.jpg",
"layout": {
"expand": "page",
"render": "flow",
"version": 2,
"dividers": false,
"elements": [
{
"id": "body",
"type": "field",
"visible": true,
"property": "body",
"hideWhenEmpty": true
},
{
"id": "title",
"type": "field",
"label": "icon",
"style": {
"span": 9,
"order": 0,
"alignItems": "center"
},
"property": "title",
"labelPosition": "left"
},
{
"id": "metrics",
"type": "group",
"style": {
"gap": "md",
"span": 3,
"order": 1,
"alignItems": "center"
},
"elements": [
{
"id": "reps",
"type": "field",
"label": "unit",
"style": {
"fill": false,
"fontSize": "sm",
"labelGap": 2,
"alignItems": "center"
},
"property": "reps",
"labelPosition": "right"
}
]
}
]
},
"bindings": [
{
"data_type": "title",
"binding_key": "title",
"column_span": 4,
"property_key": "entry-title",
"display_order": 0,
"page_visibility": "always_show"
},
{
"data_type": "number",
"binding_key": "reps",
"column_span": 1,
"property_key": "repetitions",
"display_order": 0,
"page_visibility": "always_show"
},
{
"data_type": "markdown",
"binding_key": "body",
"column_span": 4,
"property_key": "page",
"display_order": 1,
"page_visibility": "always_show"
}
],
"body_mode": "none",
"description": "## How to do an assisted one-leg sit-up\n\nA sit-up with one leg bent and one leg extended, using your hands or the bent leg for a little help. Harder than a normal sit-up because one side of the hip flexors cannot pitch in, so it exposes any left/right imbalance.\n\n**Watch this first:**\n\nhttps://www.youtube.com/watch?v=QoznNIG0dCM\n\n### Setup\n\n1. Lie on your back. **One knee bent**, that foot flat on the floor; the other leg straight along the ground.\n2. Arms crossed on the chest, or reaching forward — reaching forward is easier.\n3. Press your lower back gently toward the floor and brace.\n\n### The movement\n\n1. Curl your head and shoulders up first, then sit all the way up, keeping the straight leg **down on the floor**.\n2. Assist as much as you need: push lightly off the floor with a hand, or hold behind the bent thigh and pull. Use only as much help as it takes to keep the movement smooth.\n3. Lower slowly and under control, one vertebra at a time.\n4. Do the **same number of reps on each side** — that is the point of the exercise.\n\n### Common mistakes\n\n- **The straight leg lifting off the floor** — the giveaway that the hip flexors have taken over. Keep the heel pinned down.\n- **Yanking the neck** with the hands.\n- **Twisting** toward the bent leg. Keep the shoulders square.\n- **Skipping the weaker side** — always match the reps to your weaker side.\n\n### Too hard? Regress it\n\n- Assist more with the hands, or bend the straight leg a little.\n- **Negatives** — start sat up, lower as slowly as you can.\n- Do plain **sit-ups** and **crunches** until the strength is there.\n\n### Too easy? Progress it\n\n- **Less assistance**, then none at all.\n- **Arms crossed on the chest**, then overhead.\n- Slow tempo — 3s up, 3s down.\n\n### How many?\n\n- Log every set, and record both sides. Match the strong side to the weak side.\n- 3 sets of 5–12 per leg, 2–3× per week.\n",
"sample_entries": [
{
"title": null,
"values": {
"reps": 12
}
},
{
"title": null,
"values": {
"reps": 12
}
},
{
"title": null,
"values": {
"reps": 15
}
}
],
"title_column_span": 2,
"title_display_order": 0
},
{
"key": "kettlebell-front-squat",
"kind": "entity",
"name": "Kettlebell front squat",
"emoji": "image:/exercise-icons/kettlebell-front-squat.jpg",
"layout": {
"expand": "page",
"render": "flow",
"version": 2,
"dividers": false,
"elements": [
{
"id": "title",
"type": "field",
"label": "icon",
"style": {
"span": 7,
"order": 0,
"alignItems": "center"
},
"property": "title",
"labelPosition": "left"
},
{
"id": "metrics",
"type": "group",
"style": {
"gap": "md",
"span": 5,
"order": 1,
"alignItems": "center"
},
"elements": [
{
"id": "weight",
"type": "field",
"label": "unit",
"style": {
"fill": false,
"fontSize": "sm",
"labelGap": 2,
"alignItems": "center"
},
"property": "weight",
"labelPosition": "right"
},
{
"id": "reps",
"type": "field",
"label": "unit",
"style": {
"fill": false,
"fontSize": "sm",
"labelGap": 2,
"alignItems": "center"
},
"property": "reps",
"labelPosition": "right"
}
]
}
]
},
"bindings": [
{
"data_type": "title",
"binding_key": "title",
"column_span": 4,
"property_key": "entry-title",
"display_order": 0,
"page_visibility": "always_show"
},
{
"data_type": "number",
"binding_key": "reps",
"column_span": 1,
"property_key": "repetitions",
"display_order": 1,
"page_visibility": "always_show",
"custom_display_name": "reps"
},
{
"data_type": "number",
"binding_key": "weight",
"column_span": 1,
"property_key": "weight",
"display_order": 2,
"page_visibility": "always_show",
"custom_display_name": "kg"
},
{
"data_type": "markdown",
"binding_key": "body",
"column_span": 4,
"property_key": "page",
"display_order": 3,
"page_visibility": "always_show"
}
],
"body_mode": "none",
"description": "## How to do a kettlebell front squat\n\nA squat with the bell (or two) held in the rack position. The front load forces an upright torso, which makes it one of the most back-friendly ways to squat heavy-ish.\n\n**Watch this first (single-bell version — the same rules apply with two):**\n\nhttps://www.youtube.com/watch?v=OkJNQiPJjBk\n\n### Setup\n\n1. Clean the bell into the **rack**: handle diagonally across the palm, bell on the back of the forearm, wrist straight, elbow tucked into the ribcage.\n2. Feet shoulder-width, toes slightly out.\n3. Brace your abs like you are about to be poked in the stomach. Ribs down.\n\n### The movement\n\n1. Sit **down and slightly back**, knees tracking out over your toes.\n2. Go as deep as you can while keeping your **lower back neutral** — ideally hips below knee level.\n3. Keep the chest tall and the elbow glued to the ribs the whole way; the bell must not drift forward.\n4. Drive through the whole foot to stand, squeezing the glutes at the top.\n5. Breathe in at the top, brace, out as you stand up.\n\n### Common mistakes\n\n- **Butt wink** — the lower back rounding at the bottom. Stop at the depth where your back stays neutral.\n- **Heels lifting** — usually ankle mobility. Squat to a lower depth, or elevate the heels slightly.\n- **Elbow drifting away from the body** — the bell pulls you forward and the rack collapses.\n- **Knees caving in** — push them out.\n\n### Too hard? Regress it\n\n- **Bodyweight squat** or **goblet squat** (bell held at the chest with both hands) to learn the pattern.\n- **Box squat** — sit to a bench so depth is consistent and honest.\n\n### Too easy? Progress it\n\n- **Double kettlebell front squat** — two bells racked.\n- **Pause squat** — 2–3s at the bottom.\n- Heavier bell, or slow 3s descents.\n\n### How many?\n\n- Log every set. Depth and a neutral back set the limit, not the weight.\n- 3–5 sets of 5–10, 2–3× per week.\n",
"sample_entries": [
{
"title": null,
"values": {
"reps": 8,
"weight": 16
}
},
{
"title": null,
"values": {
"reps": 8,
"weight": 20
}
},
{
"title": null,
"values": {
"reps": 6,
"weight": 24
}
}
],
"title_column_span": 2,
"title_display_order": 0
},
{
"key": "kettlebell-arnold-press",
"kind": "entity",
"name": "Kettlebell Arnold press",
"emoji": "image:/exercise-icons/kettlebell-overhead-press.jpg",
"layout": {
"expand": "page",
"render": "flow",
"version": 2,
"dividers": false,
"elements": [
{
"id": "title",
"type": "field",
"label": "icon",
"style": {
"span": 7,
"order": 0,
"alignItems": "center"
},
"property": "title",
"labelPosition": "left"
},
{
"id": "metrics",
"type": "group",
"style": {
"gap": "md",
"span": 5,
"order": 1,
"alignItems": "center"
},
"elements": [
{
"id": "weight",
"type": "field",
"label": "unit",
"style": {
"fill": false,
"fontSize": "sm",
"labelGap": 2,
"alignItems": "center"
},
"property": "weight",
"labelPosition": "right"
},
{
"id": "reps",
"type": "field",
"label": "unit",
"style": {
"fill": false,
"fontSize": "sm",
"labelGap": 2,
"alignItems": "center"
},
"property": "reps",
"labelPosition": "right"
}
]
}
]
},
"bindings": [
{
"data_type": "title",
"binding_key": "title",
"column_span": 4,
"property_key": "entry-title",
"display_order": 0,
"page_visibility": "always_show"
},
{
"data_type": "number",
"binding_key": "reps",
"column_span": 1,
"property_key": "repetitions",
"display_order": 1,
"page_visibility": "always_show",
"custom_display_name": "reps"
},
{
"data_type": "number",
"binding_key": "weight",
"column_span": 1,
"property_key": "weight",
"display_order": 2,
"page_visibility": "always_show",
"custom_display_name": "kg"
},
{
"data_type": "markdown",
"binding_key": "body",
"column_span": 4,
"property_key": "page",
"display_order": 3,
"page_visibility": "always_show"
}
],
"body_mode": "none",
"description": "## How to do a kettlebell Arnold press\n\nAn overhead press with a rotation on the way up: it starts with the bell in front, palm facing you, and rotates as you press. Hits front and side delts through a bigger range than a plain press.\n\n**Watch this first:**\n\nhttps://www.youtube.com/watch?v=EAU8uxxuKdI\n\n### Setup\n\n1. Clean the bell to the rack position — handle across your palm, bell resting on the back of the forearm, wrist **straight** (never bent back).\n2. Stand tall, feet hip-width, glutes and abs braced. Elbow tucked in front of your ribs.\n3. Start with the palm facing **toward you**.\n\n### The movement\n\n1. Press up and **rotate the forearm outward** as you go, so at lockout the palm faces forward.\n2. Finish with the arm straight, biceps near your ear, bell stacked over your shoulder and hip.\n3. Reverse the rotation on the way down and return to the rack under control.\n4. Breathe out as you press, in on the way down.\n\n### Common mistakes\n\n- **Bent wrist** — the bell should sit over a straight, neutral wrist, not hanging back.\n- **Leaning back** — arching the lower back to get under the bell. Squeeze the glutes and keep the ribs down.\n- **Rotating too early or too late** — the turn should happen smoothly *through* the press, not as a separate step at the top.\n- **Shrugging the shoulder up** before the arm moves.\n\n### Too hard? Regress it\n\n- **Lighter bell** — this movement punishes weight you cannot control overhead.\n- **Half-kneeling** — one knee down kills the leg drive and forces strict form.\n- Practise a plain strict press first, add the rotation once it is smooth.\n\n### Too easy? Progress it\n\n- Heavier bell, or double kettlebells.\n- **Slow tempo** — 3s up, 3s down.\n- **Pause at the top** for 2s.\n\n### How many?\n\n- Log every set, per arm if you press one at a time.\n- 3–4 sets of 5–10 per side, 2–3× per week.\n",
"sample_entries": [
{
"title": null,
"values": {
"reps": 10,
"weight": 12
}
},
{
"title": null,
"values": {
"reps": 8,
"weight": 16
}
},
{
"title": null,
"values": {
"reps": 6,
"weight": 20
}
}
],
"title_column_span": 2,
"title_display_order": 0
}
]
}Used by
Copy this into your Kaizendex
It lands as real, editable collections in your own account — yours to rename, extend and delete. Structure only: nobody's entries are ever copied.
Free · Publishing Rules
More like this
- 🏋️Dumbbell Romanian Deadlift4 propertiesCollection✓ OfficialTrack dumbbell romanian deadlift sets with repetitions, weight and notes.KaizendexNew
- 🏋️Flat Dumbbell Press4 propertiesCollection✓ OfficialTrack flat dumbbell press sets with repetitions, weight and notes.KaizendexNew
- 🏋️Seated Leg Curl4 propertiesCollection✓ OfficialTrack seated leg curl sets with repetitions, weight and notes.KaizendexNew